Open New Tank
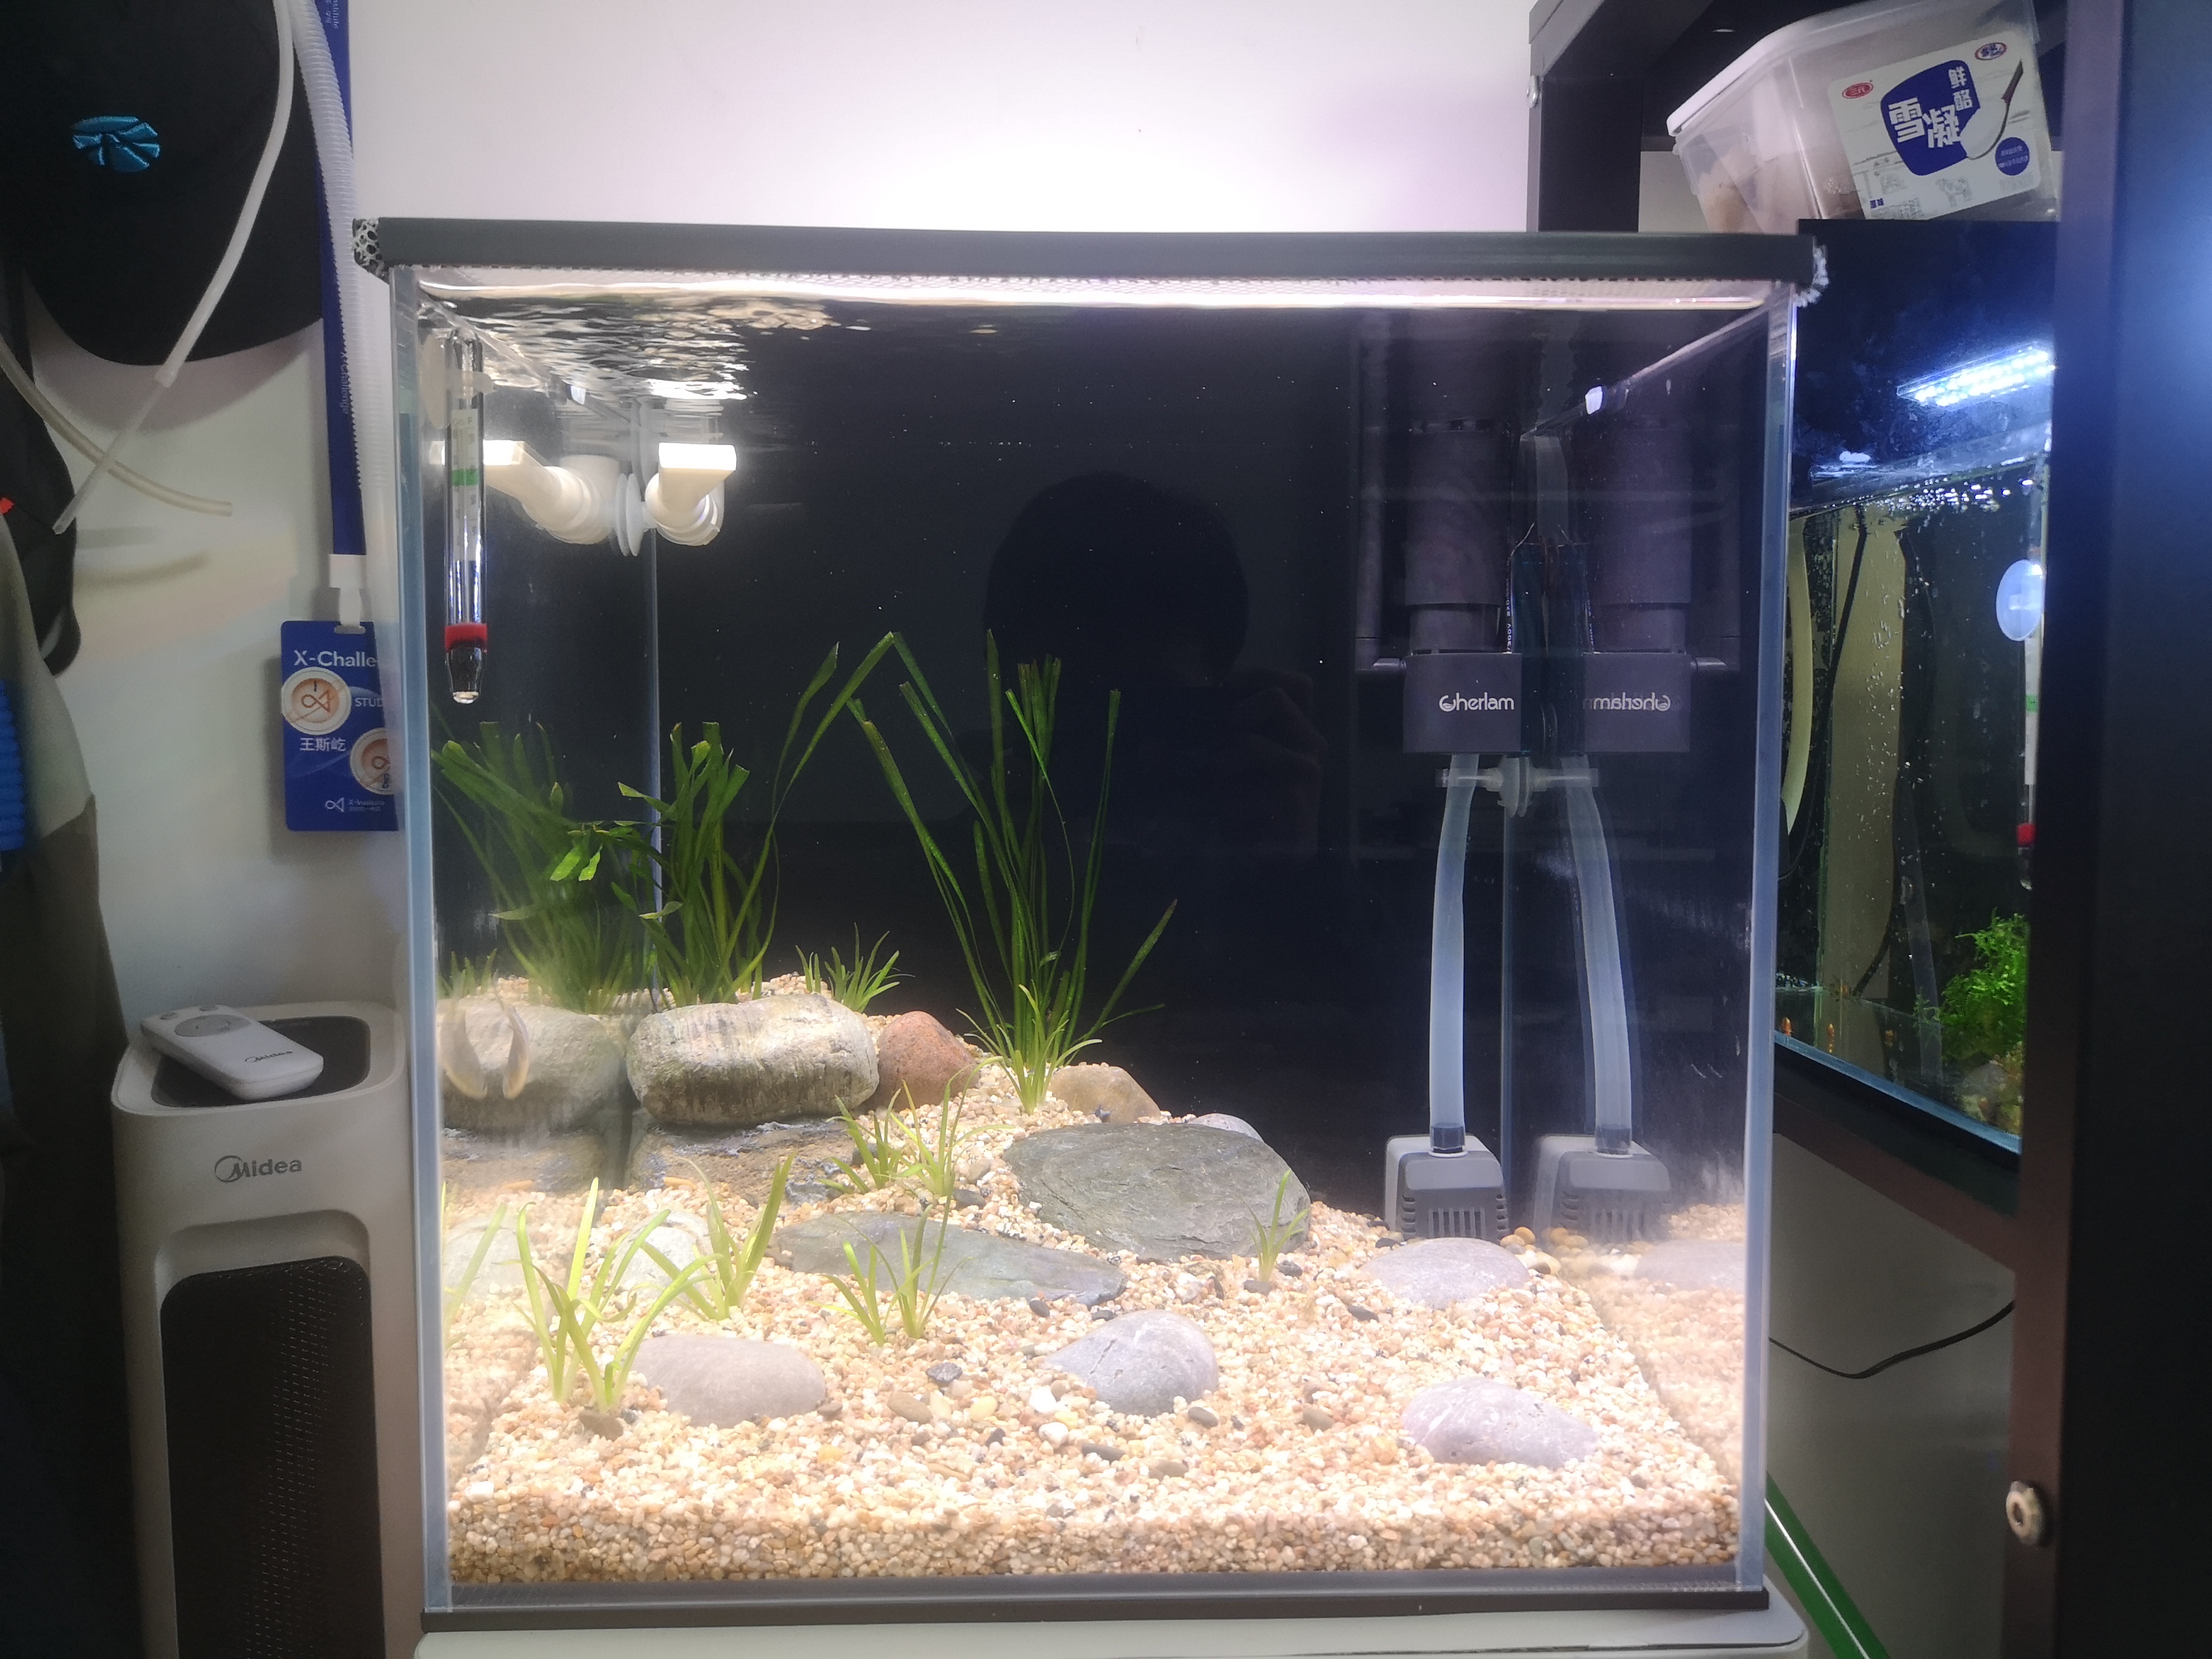
This is a recording of how I opened a small tank to raise some bitterlings. Before start, let’s see an overview of the final result.
Now it’s the time to go to the point.
Opening Process
Installing Foundamental Devices
The first step is to place the tank on the shelf and install all the necessary devices. The device list can be seen at the end of the passage.
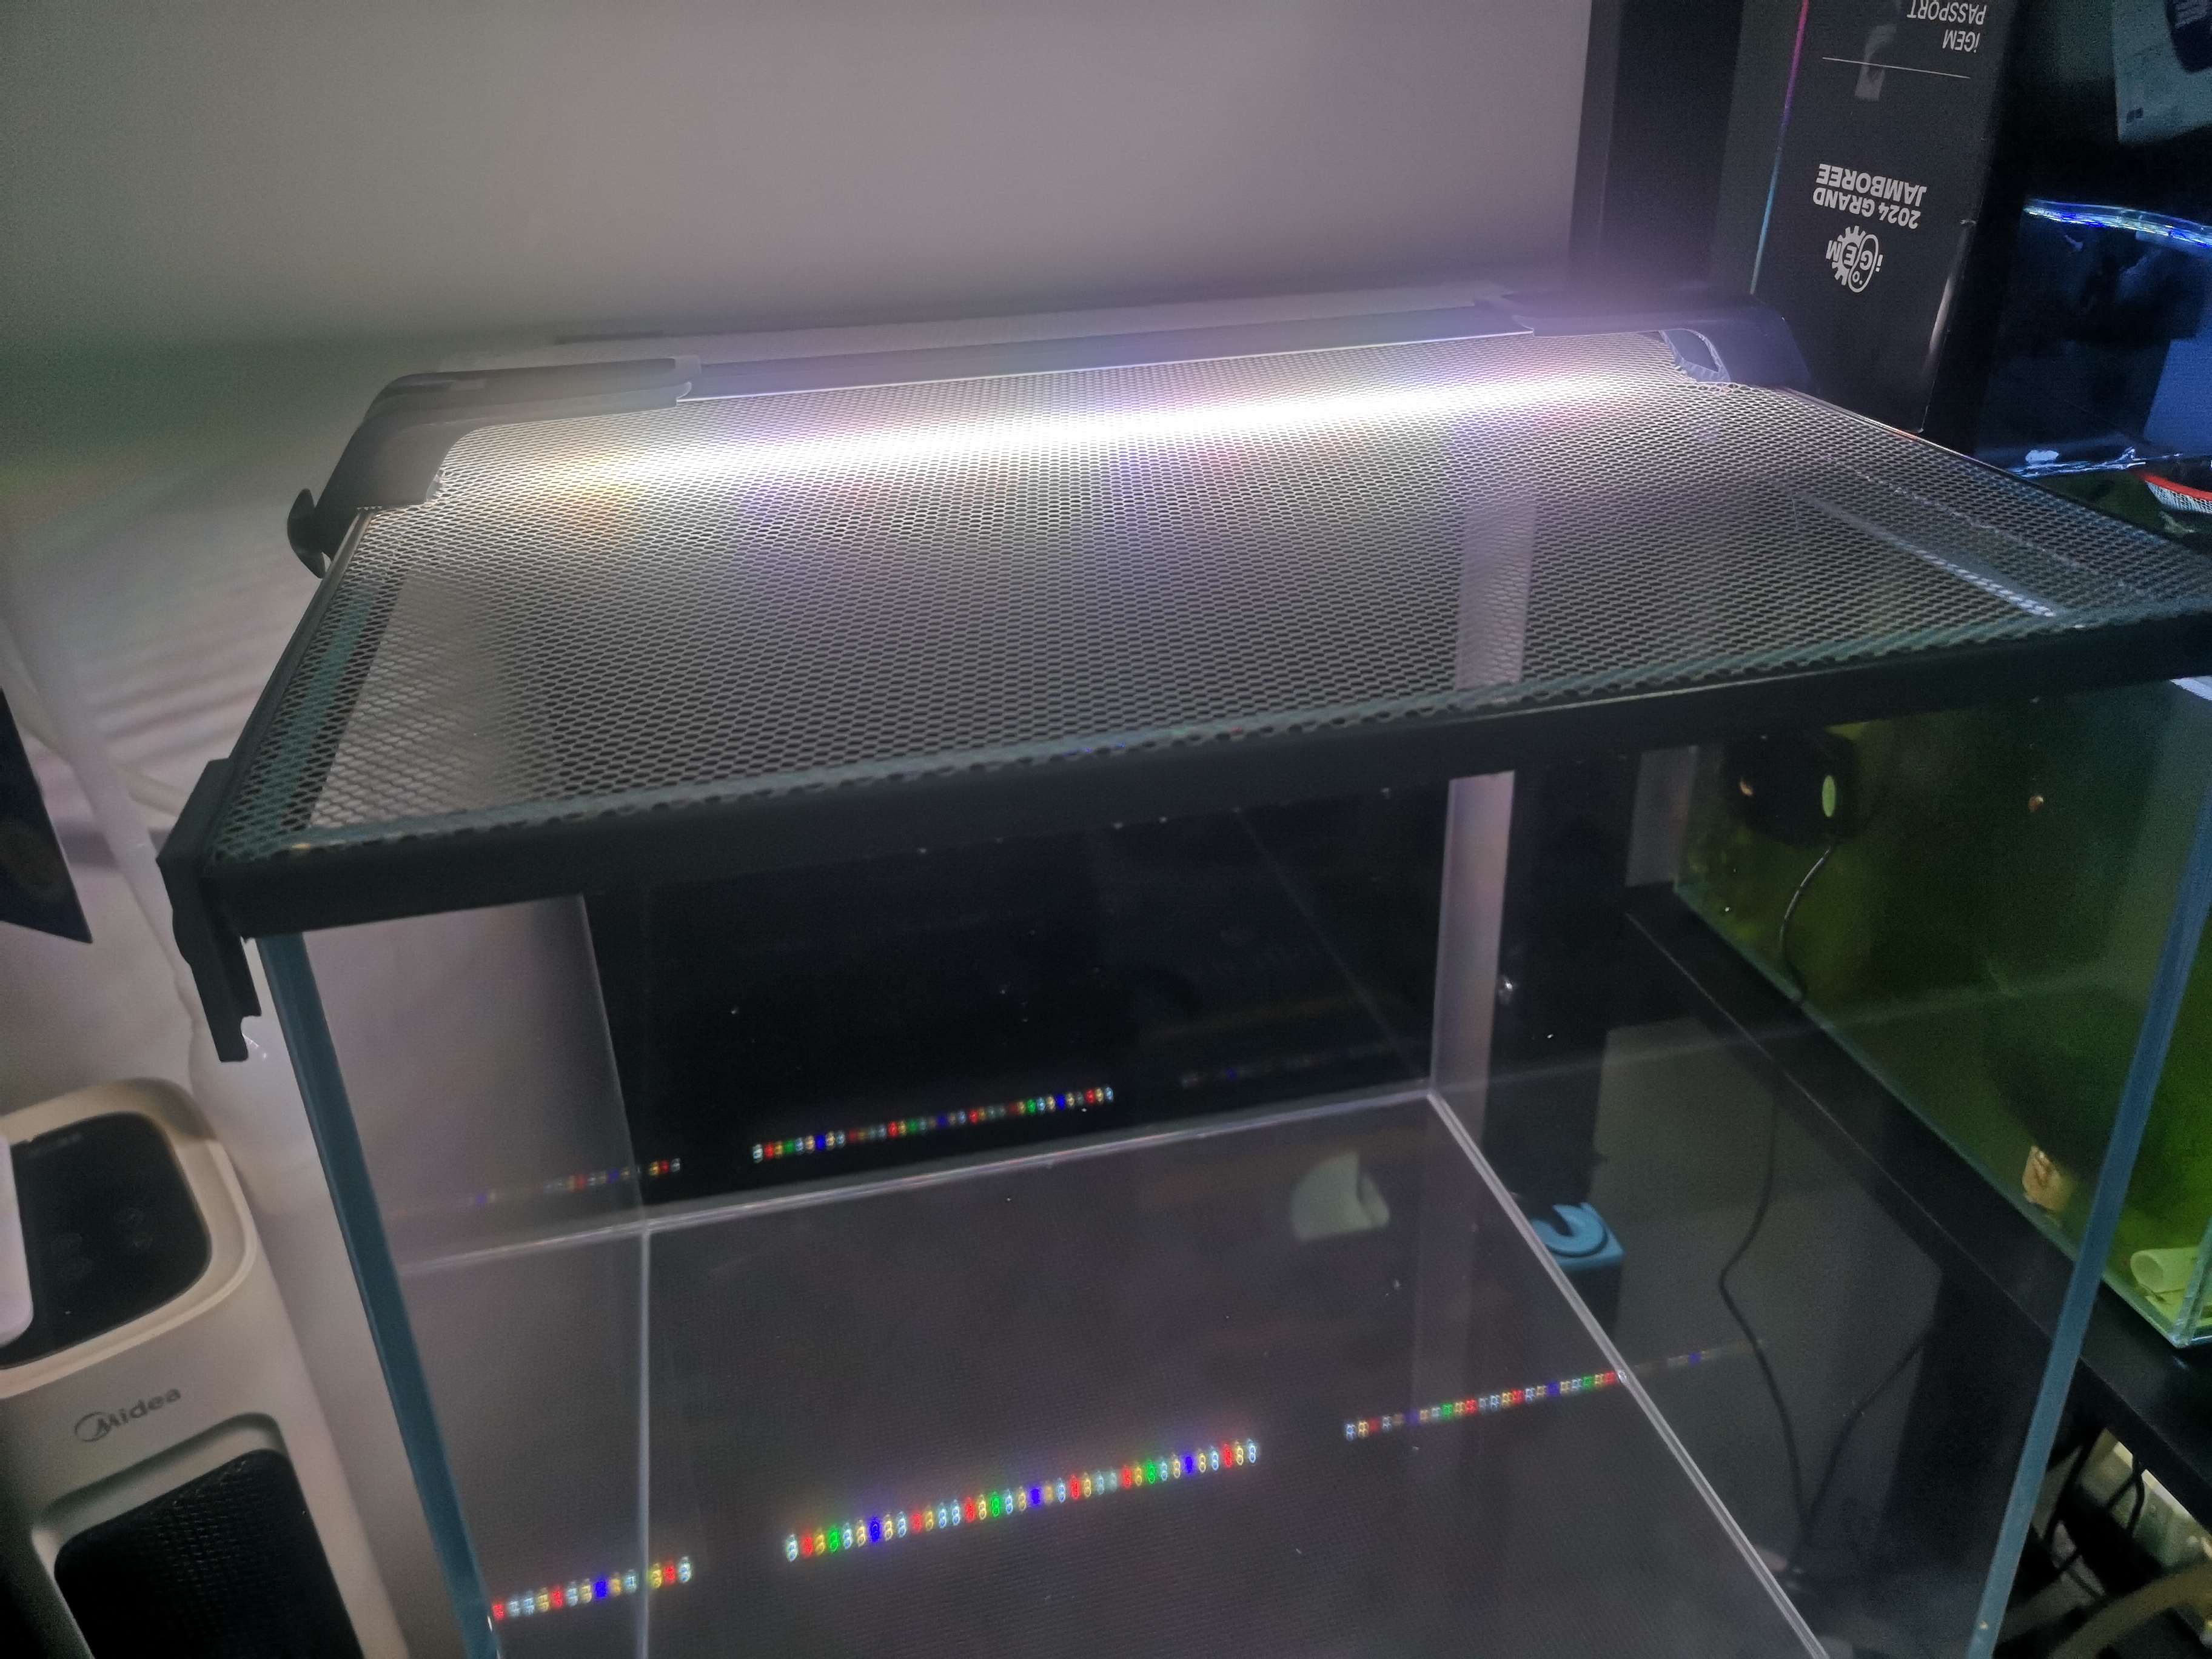
I choose a light with many different colors. This is important because it ensures that the light will cover most of the visible light spectrum, which is one of the most important factors to triger the growing of algae and the pigment synthesis on native fish skin.
Besides, There’s a black backbround film, which is helpful for the coloration of bitterlings
Moreover, you can see a net covering on the top of the tank, this is something special for native tanks. It’s funtion there is to protect fish from jumping out of the water: this is really common among wild fish, even without being frightened.
Brainsrotming Landscaping Thoughts
Before dealing with the heavy stones and constructing the skeleton, we need to think about our target–or, the function of the landscaping. This tank is gona be the home of bitterlings, so all designs are centered around being comfortable to bitterlings.
With this in mind, we can come out with following ideas:
there should be some aquatic plants, like those in the habitats. Not only mimic the nature environment, but also provide shelter for smaller fish and shrimps
some sands are required
leave the main space to fish, instead of plants or stones
water current is needed to bring fish poop away and mimic the current in streams
the landscaping should be as simple and maintainable as possible, because we do not want to put to much energy dealing with it but fish instead
Designing Landscaping
Water Flow
Now we can start our designing. let’s design with the water pump at the right rear corner and water outlet at the top left corner, water will flow from the top lect corner to the front and sink, then go back to the pump.
However, we can see that the water flow of the back area is still week, so we can put the outlet of the oil film remover at the top left corner, and then place it toward left, creating a leftward current in the back area.
Thus, a fine water current in the tank is established, which could bring fresh and oxygen-abundant water to the whole tank.
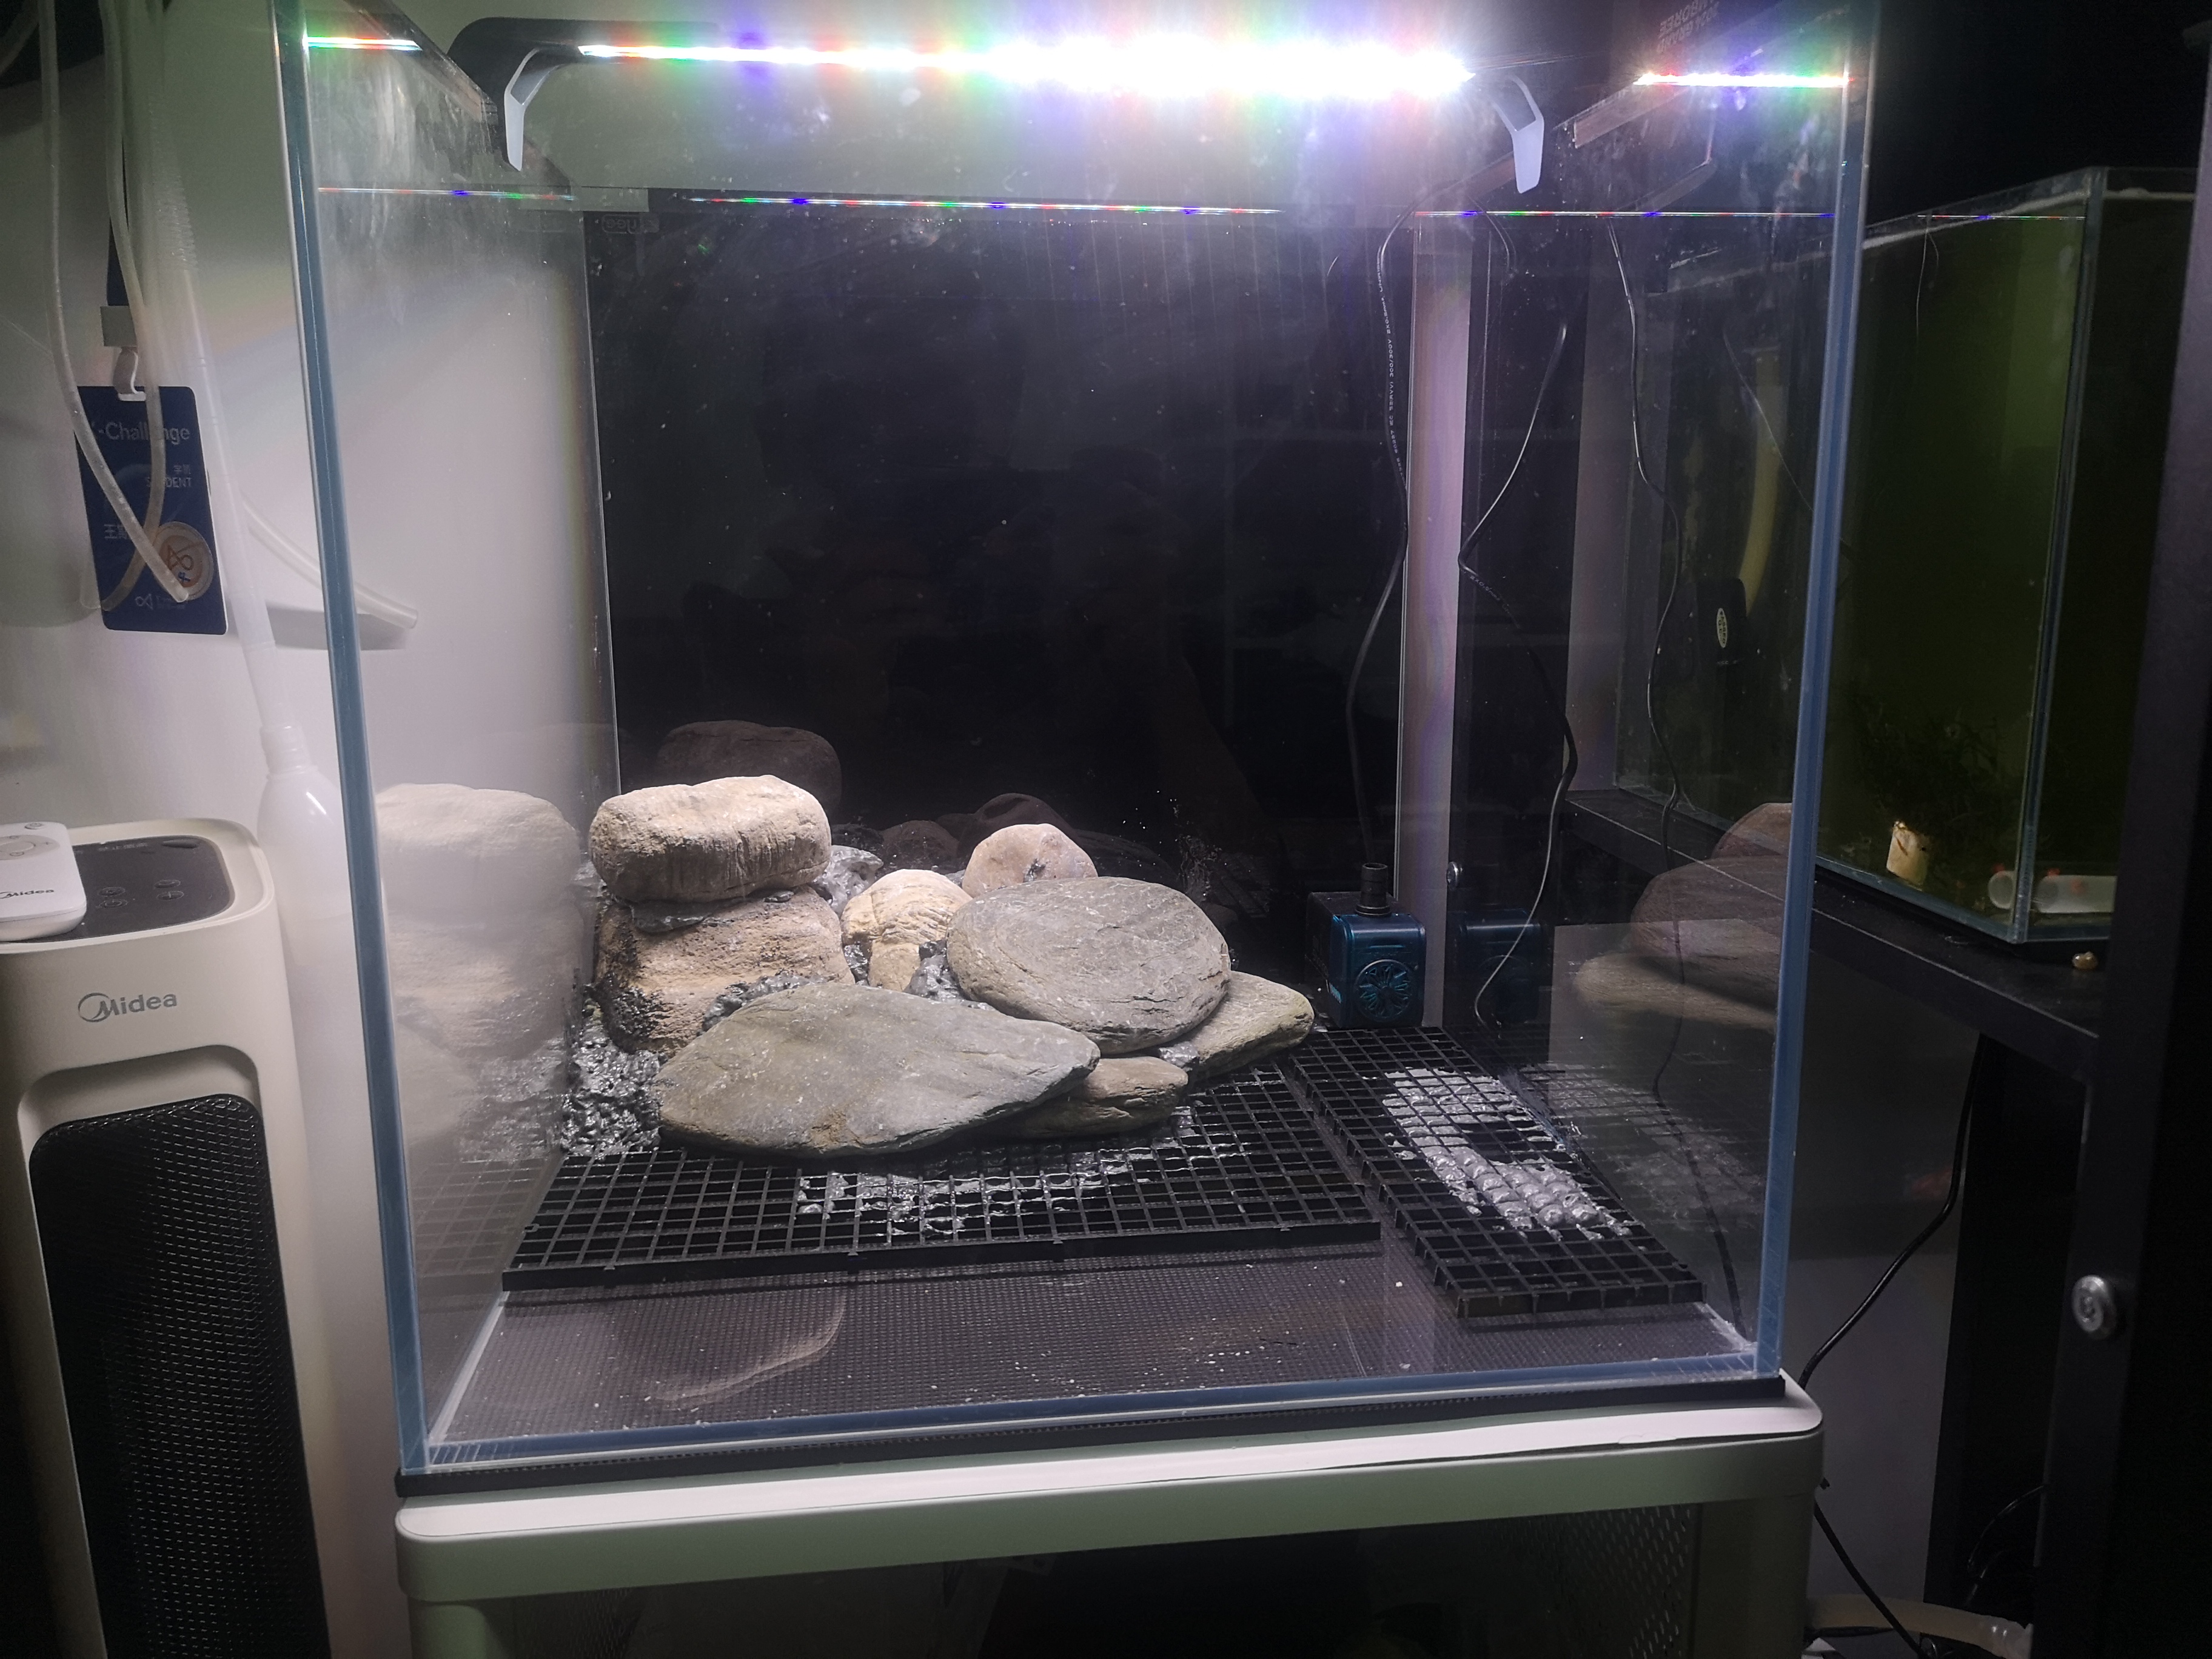
Main Skeleton
Main stones, the big stones in the tank, form the skeleton of the landscaping in the tank.
We do not want to have too complex landscaping in this tank. It will creat many dead water zone and sediment things like fish poop. Instead, it should be smooth. I mean, if we’ve got a slope, then we do not want many stairs or fissures on it, and water can thus flow smoothly and bring away all organic detritus to the filter.
So, to adapt the water flow, it’s a good idea to place the big stones at the left rear corner, and create a slope from left rear corner to both front and right side. It might be a little confusing, but I’ll show it later.
Moreover, for the smaller stones, instead of trying to have a fine design, I believe that it’s better to have some try when placing stones.
Sands and Plants
The criteria for choosing them is maintainability and native habitat. Let’s consider them separately.
Firstly, for maintainability. We definitely do not want to use mud or really short grained sands. It is not a easy thing to keep them staying at where they should be. They may just be raised when fish fighting or foraging, making the water epinephelos and damage the pump. Moreover, for plants, no one would like to plant those can easily die. We want to find some plants that are really resilient.
Besides, our environment should also be similar to bitterlings’ native habitats. Or they may be anxious or frightened, and cannot show the beautiful colors. This prevent us from using some strange materials (who know, maybe plastic SpongeBob figurines)
I mean, things like this
Based on above thoughts, I choose 3-5mm sands as subbed. It is neither too big nor too small. It’s too heavy to flow with water current in the tank and into the pump, but small enough to creat a smooth slope and avoid sedimenting too much debris.
For plantation, I choose tape grass (Vallisneria natans) and dwarf sagittaria (Sagittaria subulata), which are both resilient. Tape grass can grow really high, and reproduce through stolon, so we can plant a few at the back corner, and let is grow freely. Dwarf sagittaria is smaller, and can be planted between stones, to make the environment looks more lush with vegetations without encroaching upon bitterlings’ swimming space.
Contructing
Main Stones
Never forget to pad grid plate at the bottom of the tank, or the heavy stones might brake the glass
The first step is to have a overall structure made by big stones. Stones are carefully sticked by polystyrene foam.
Don’t worry about the exposed vestige, they will be covered by sands and algae soon.
Small Stones
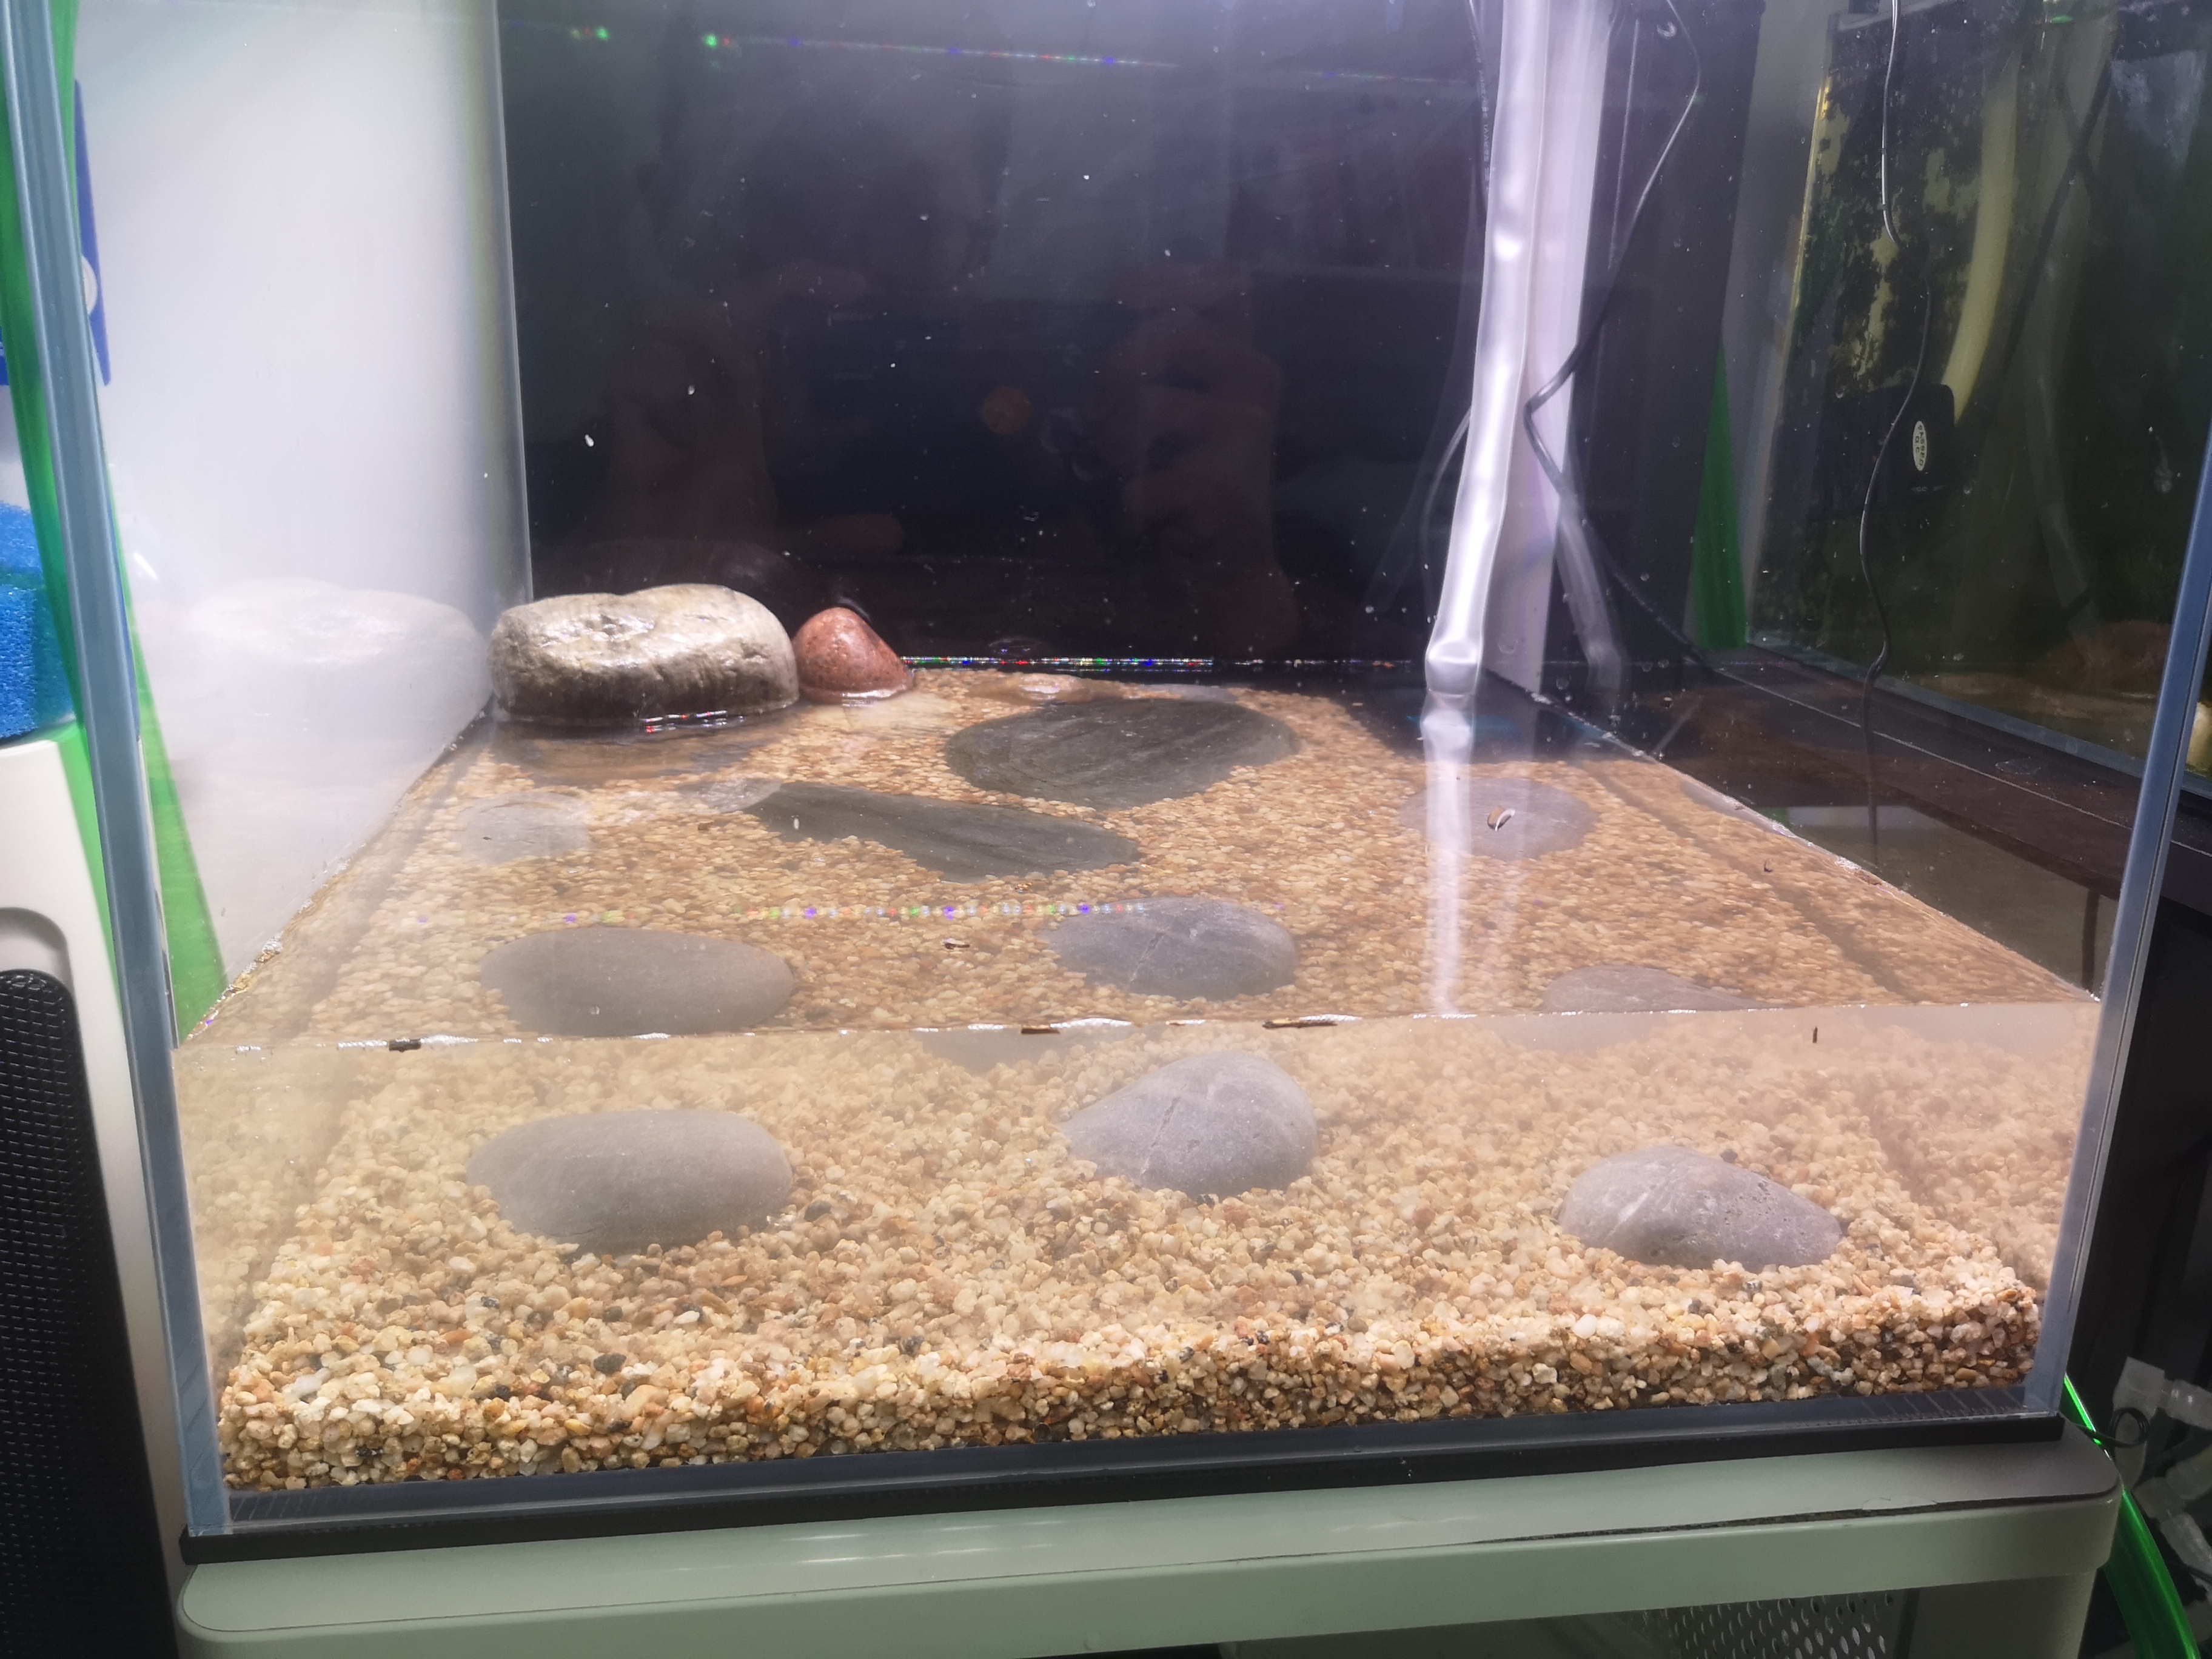
Then, we can add some saperated cobblestones to the tank. They don’t need to follow strict rules. You can just place them at places look comfortable. Sometimes if you feel a bit awkward of the stones, you can imagine what they will look like after adding sands.
Some times adjustments are needed. There are some tips:
Never place all stone in a straight line
If there’s a large empty space (several times than a stone), then you can place one
Place the stones in the most stable ways
Do not use too big stones, as you want is to fit in the whole landscaping
Never stick it until you final confirm their location
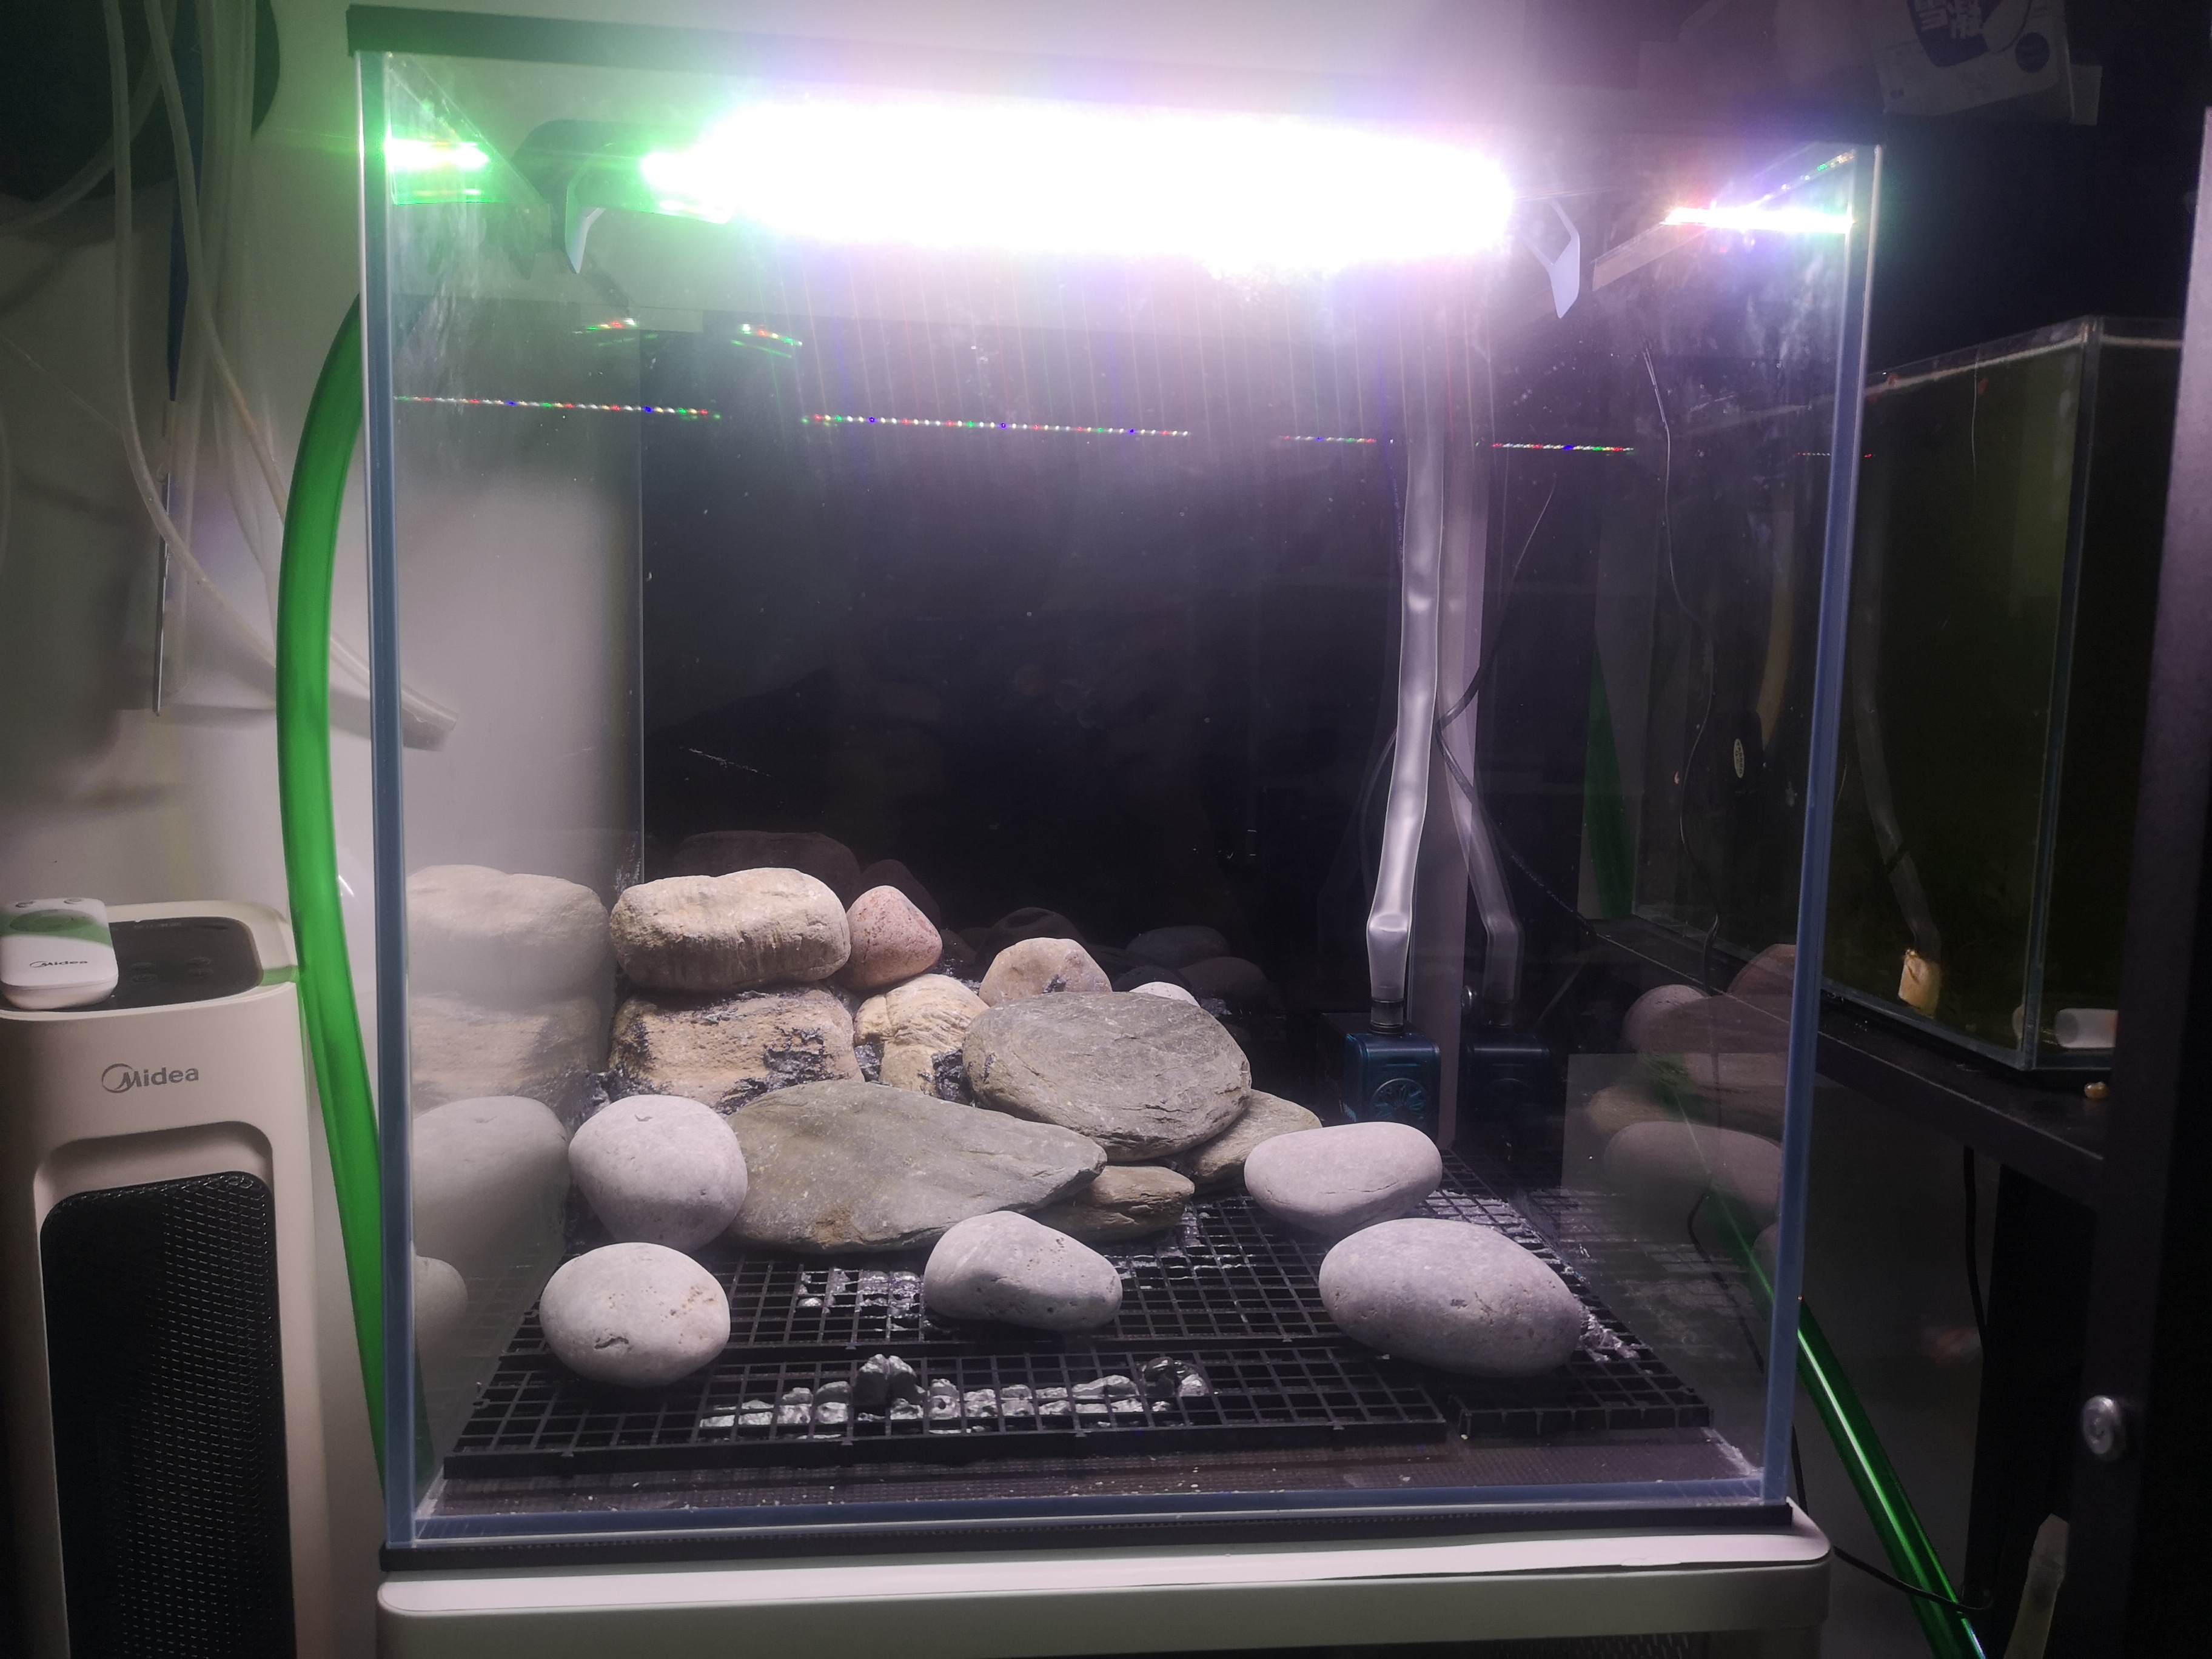
This is how I place my stones. It doesn’t look very natural now, but you can compare it after adding sands and plants.
Sands
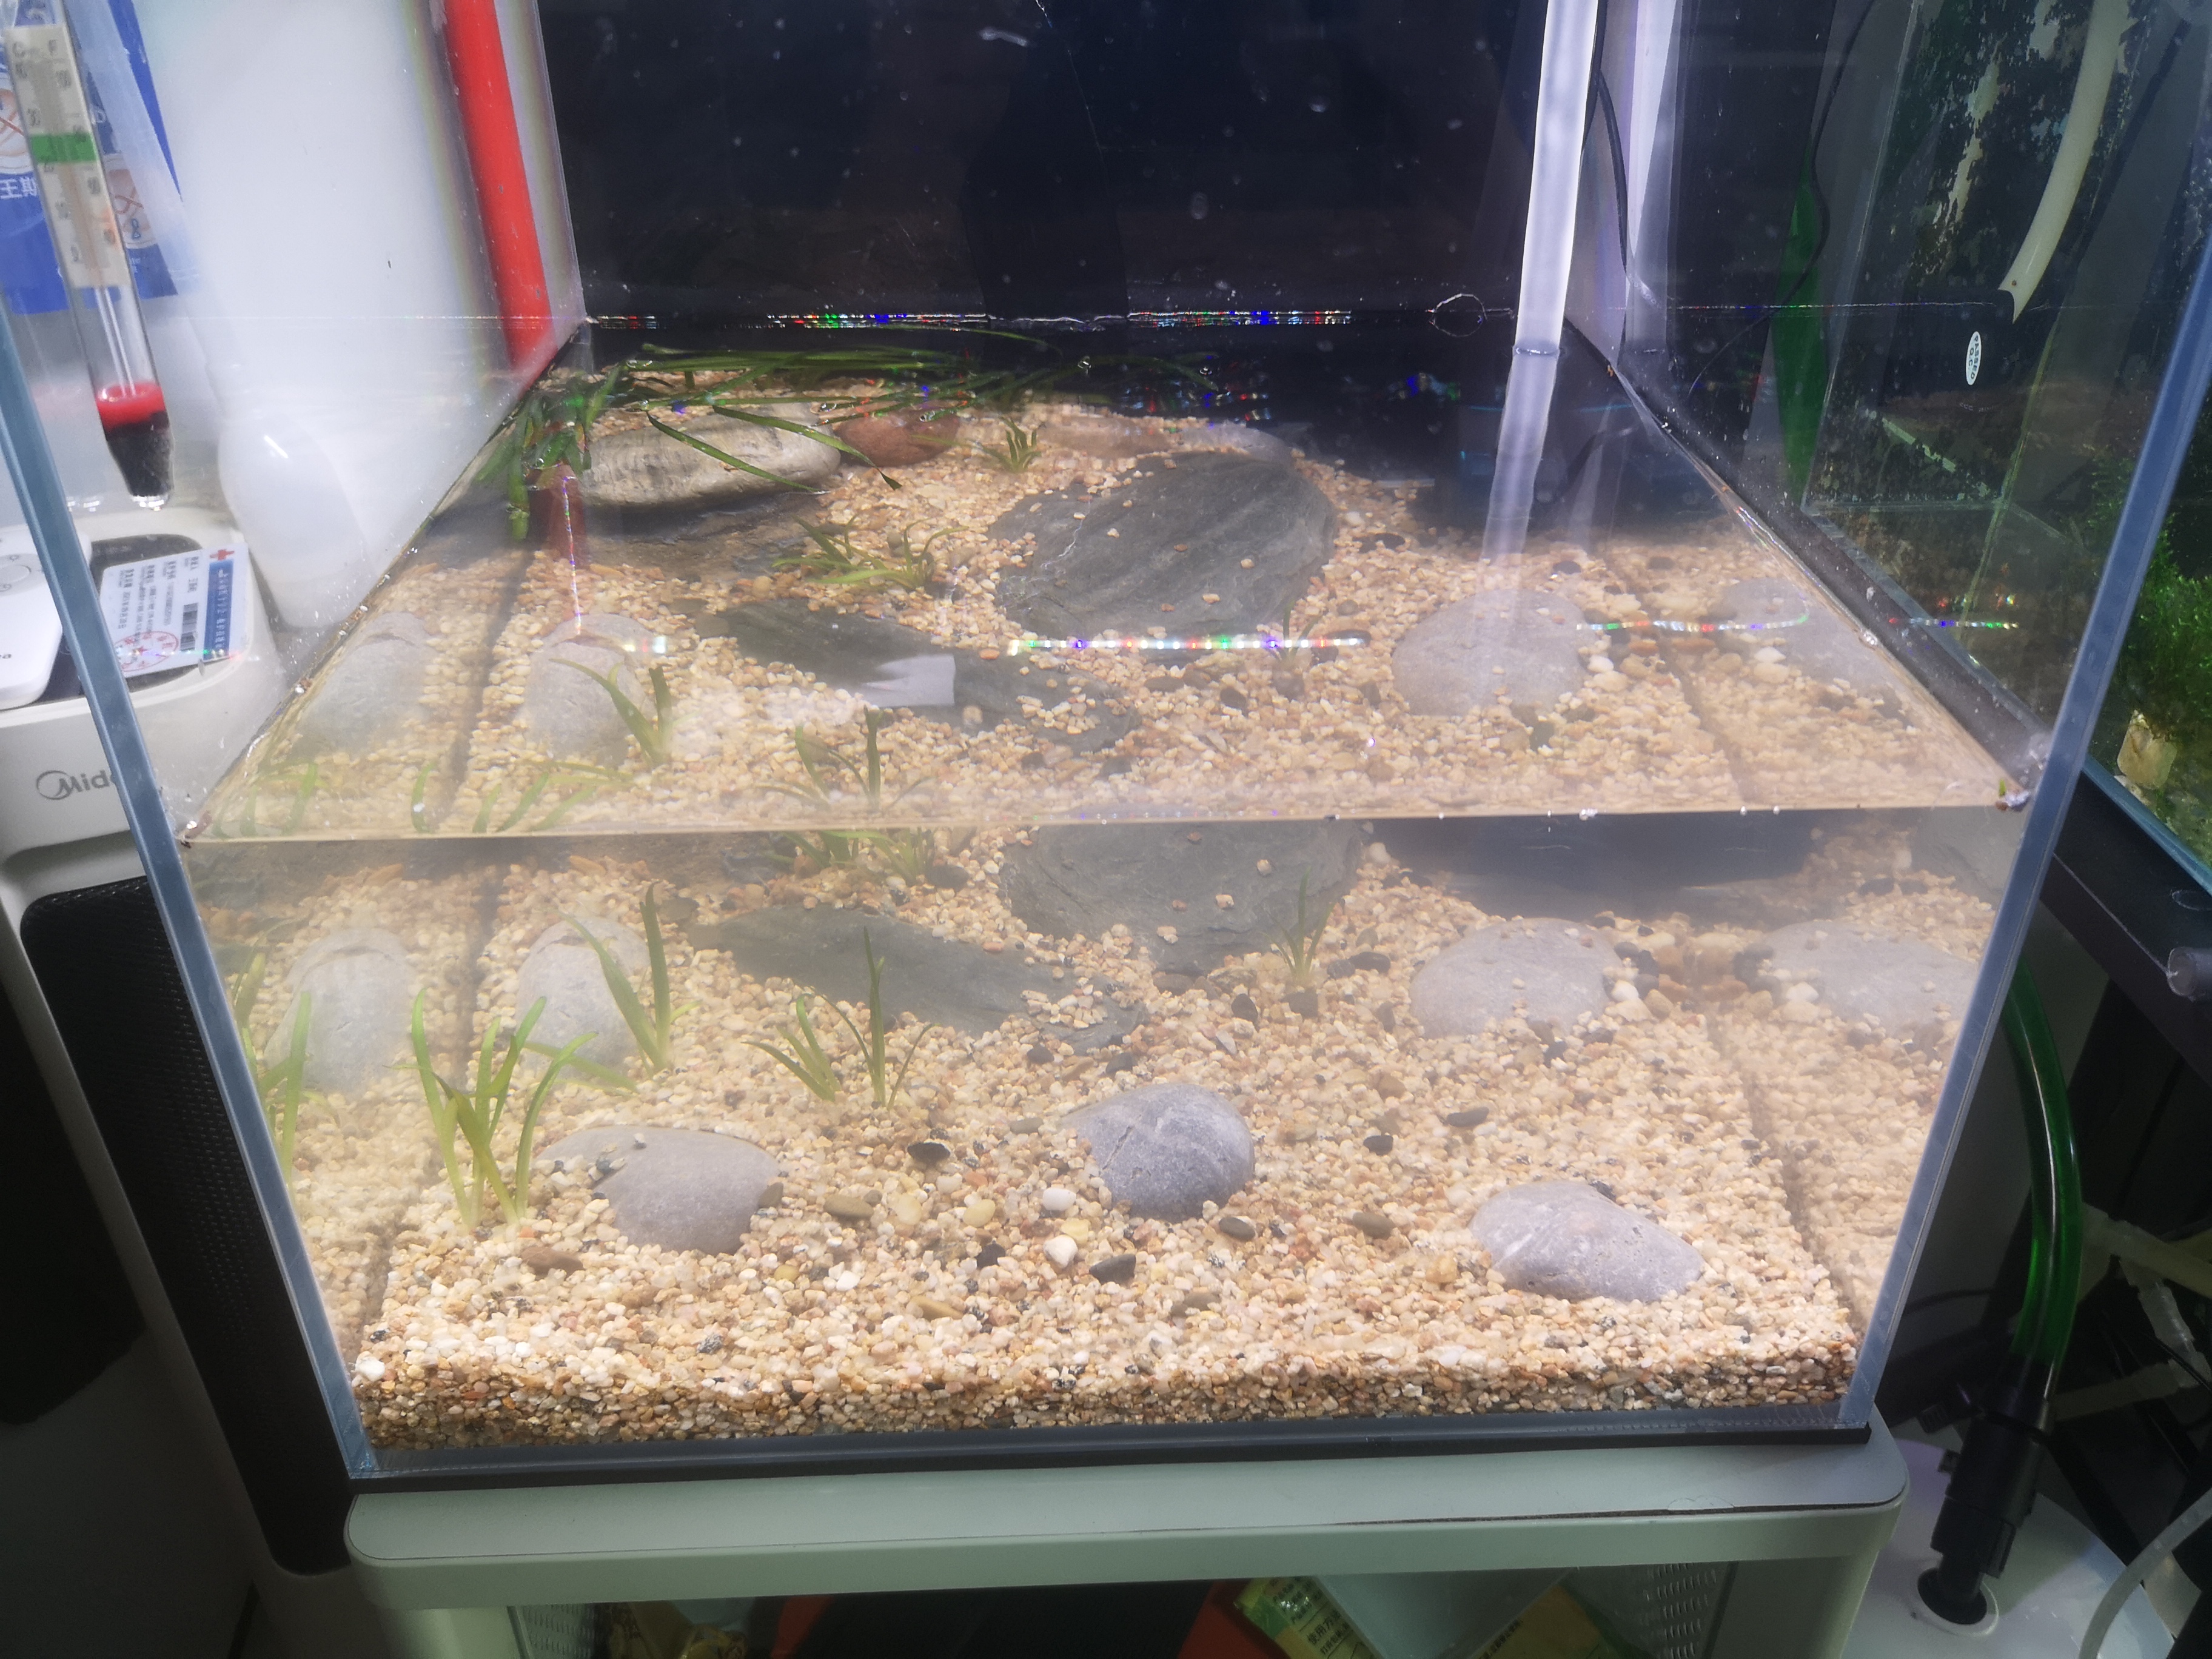
After confirming the location of all stones, we can add our sands.
I did two things before adding sands. Firstly, I washed it carefully, to remove dusts, leaves, and small sticks. Next, I used some larger pebbles to circle the pump, to prevent sands from stucking at the inlet of the water pump.
After I leveled the sand, it looks like this. See? The stones do not look strange.
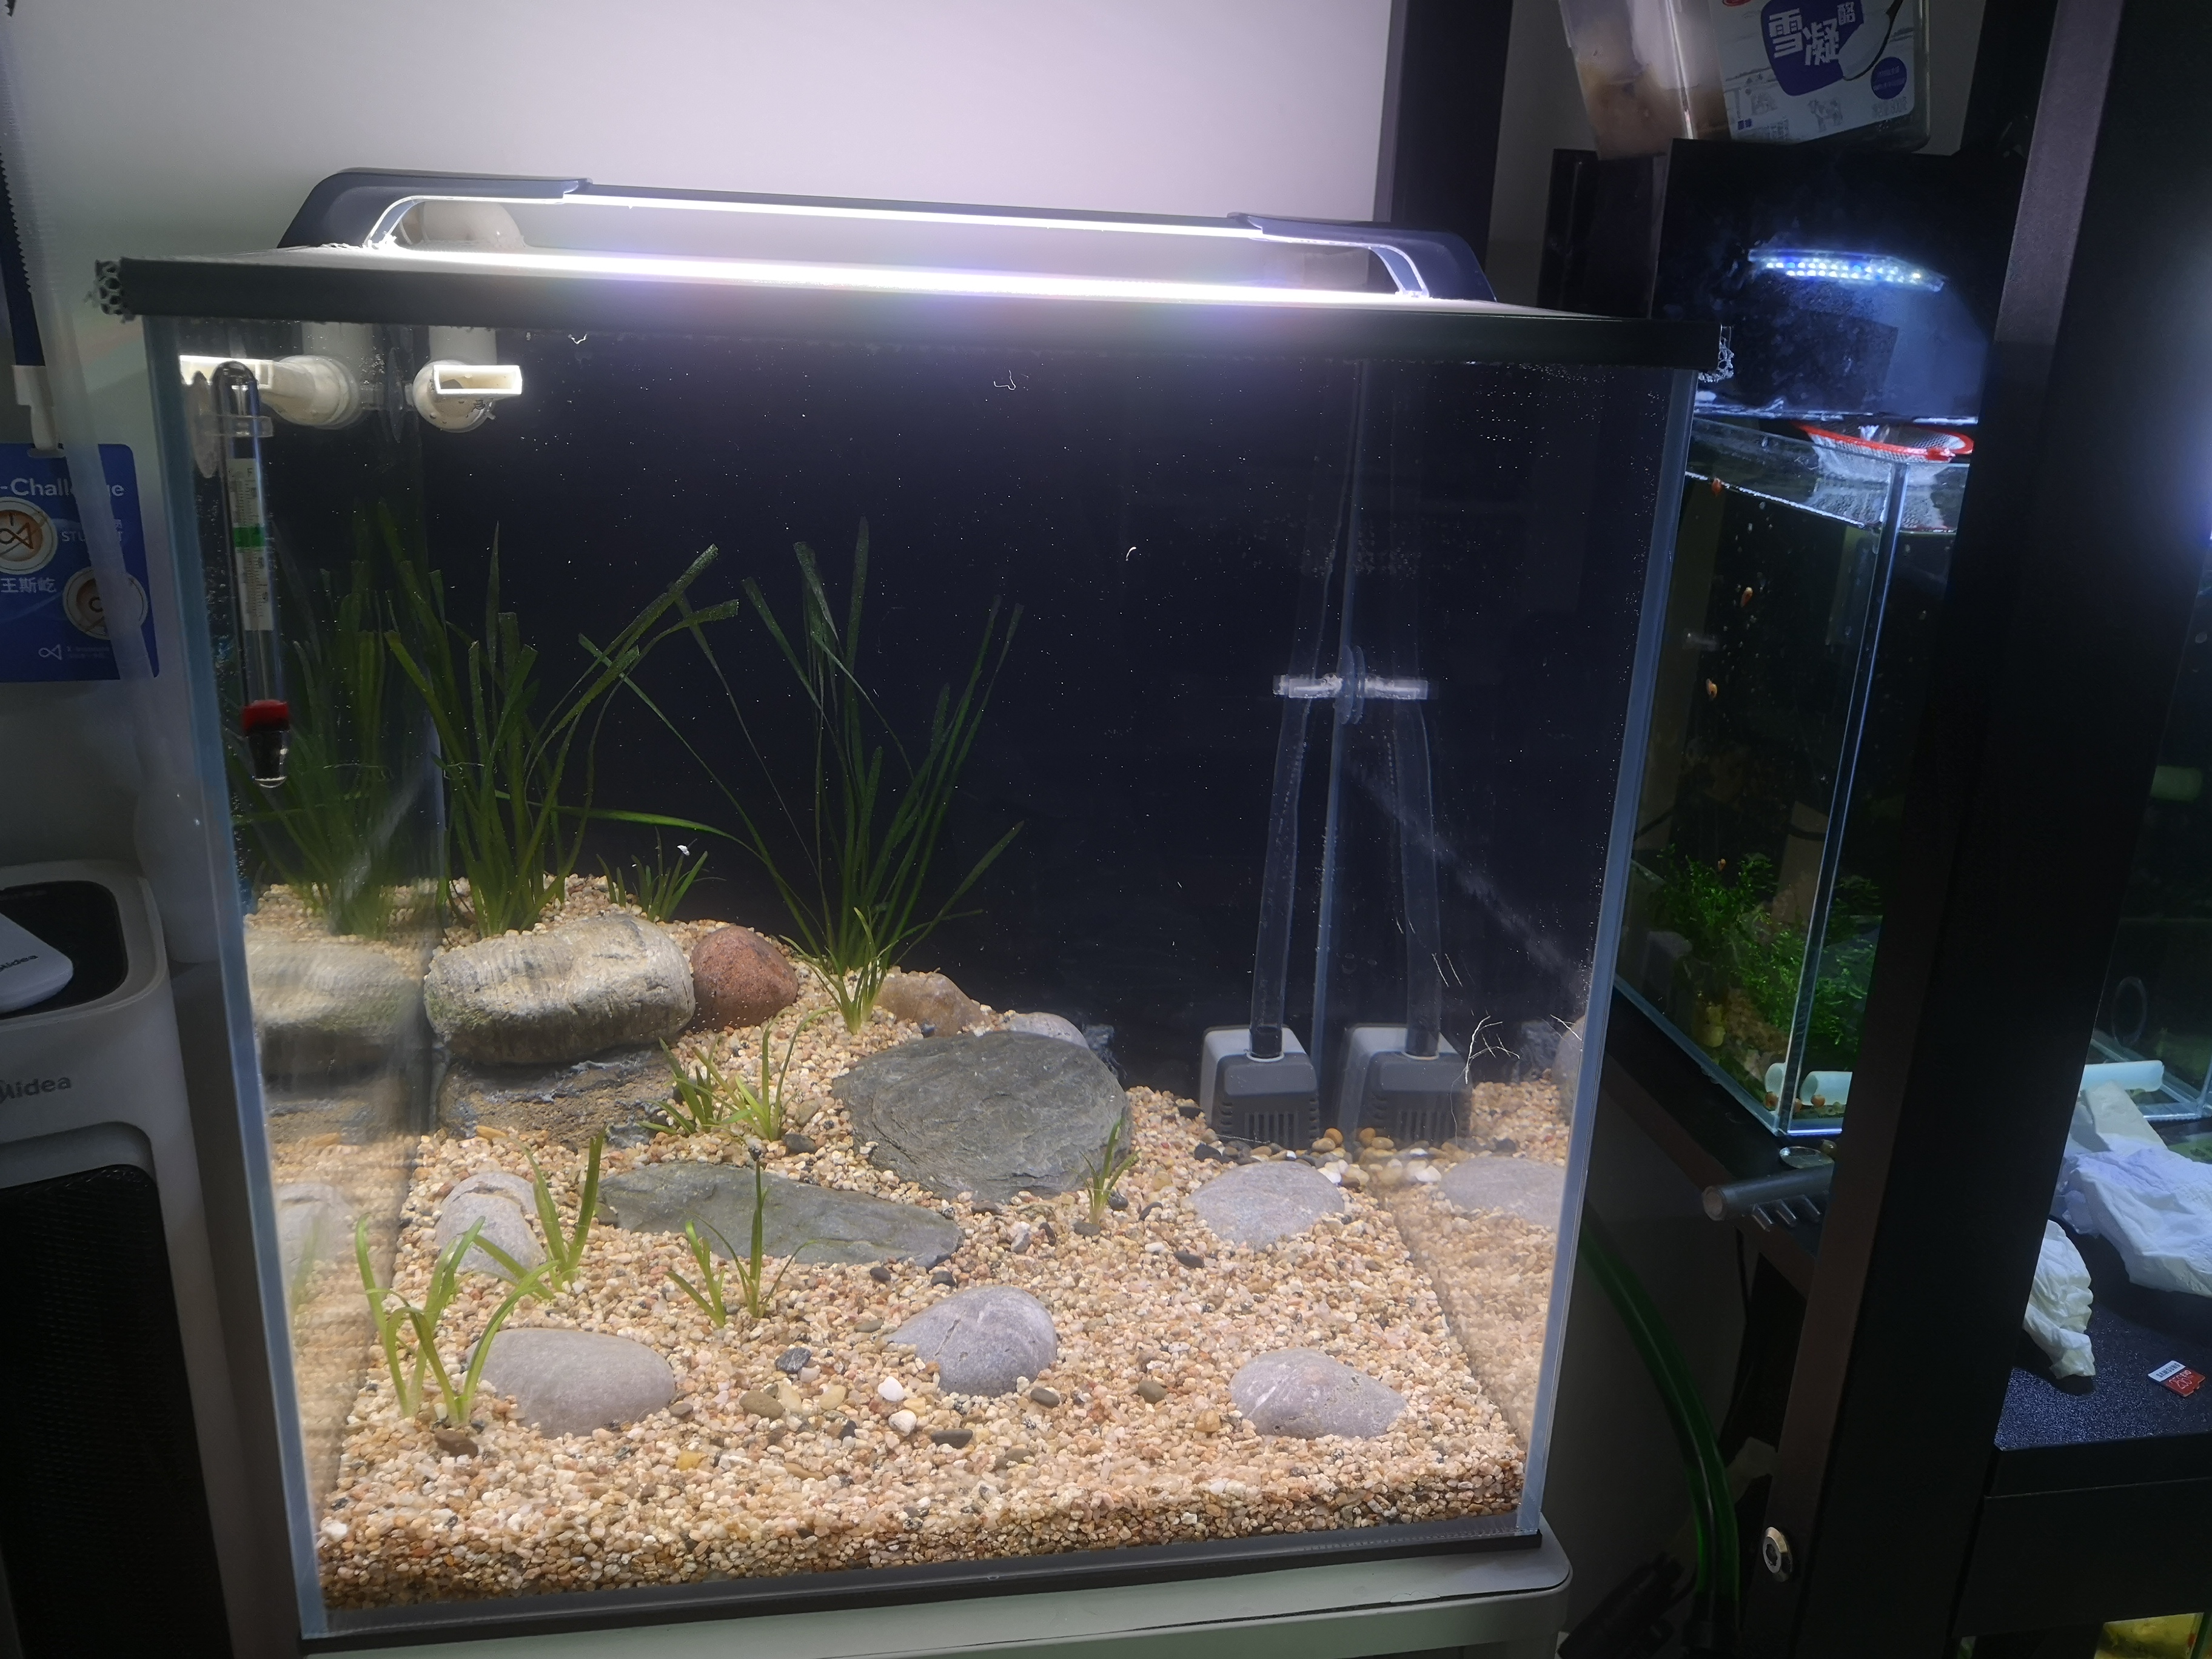
Plants
Planting grasses in such a tank is really easy. You do not need to carefully maintain the space, control the depth of their roots, control carbon dioxide and light level to ensure survival, and some other annoying things.
The right method is just to separate each individual grass, remove the dead leaves, dig a small hole with your finger, put the root in it, then cover it with sands. You even don’t need to waight for the rooting before adding water.
Though it looks not luxuriant now, you will get a whole tank of green leaves after a month.
Adding Water and Cleaning Up
Everything is ready now, so it’s time to clean the sands on rocks and fill it up with water.
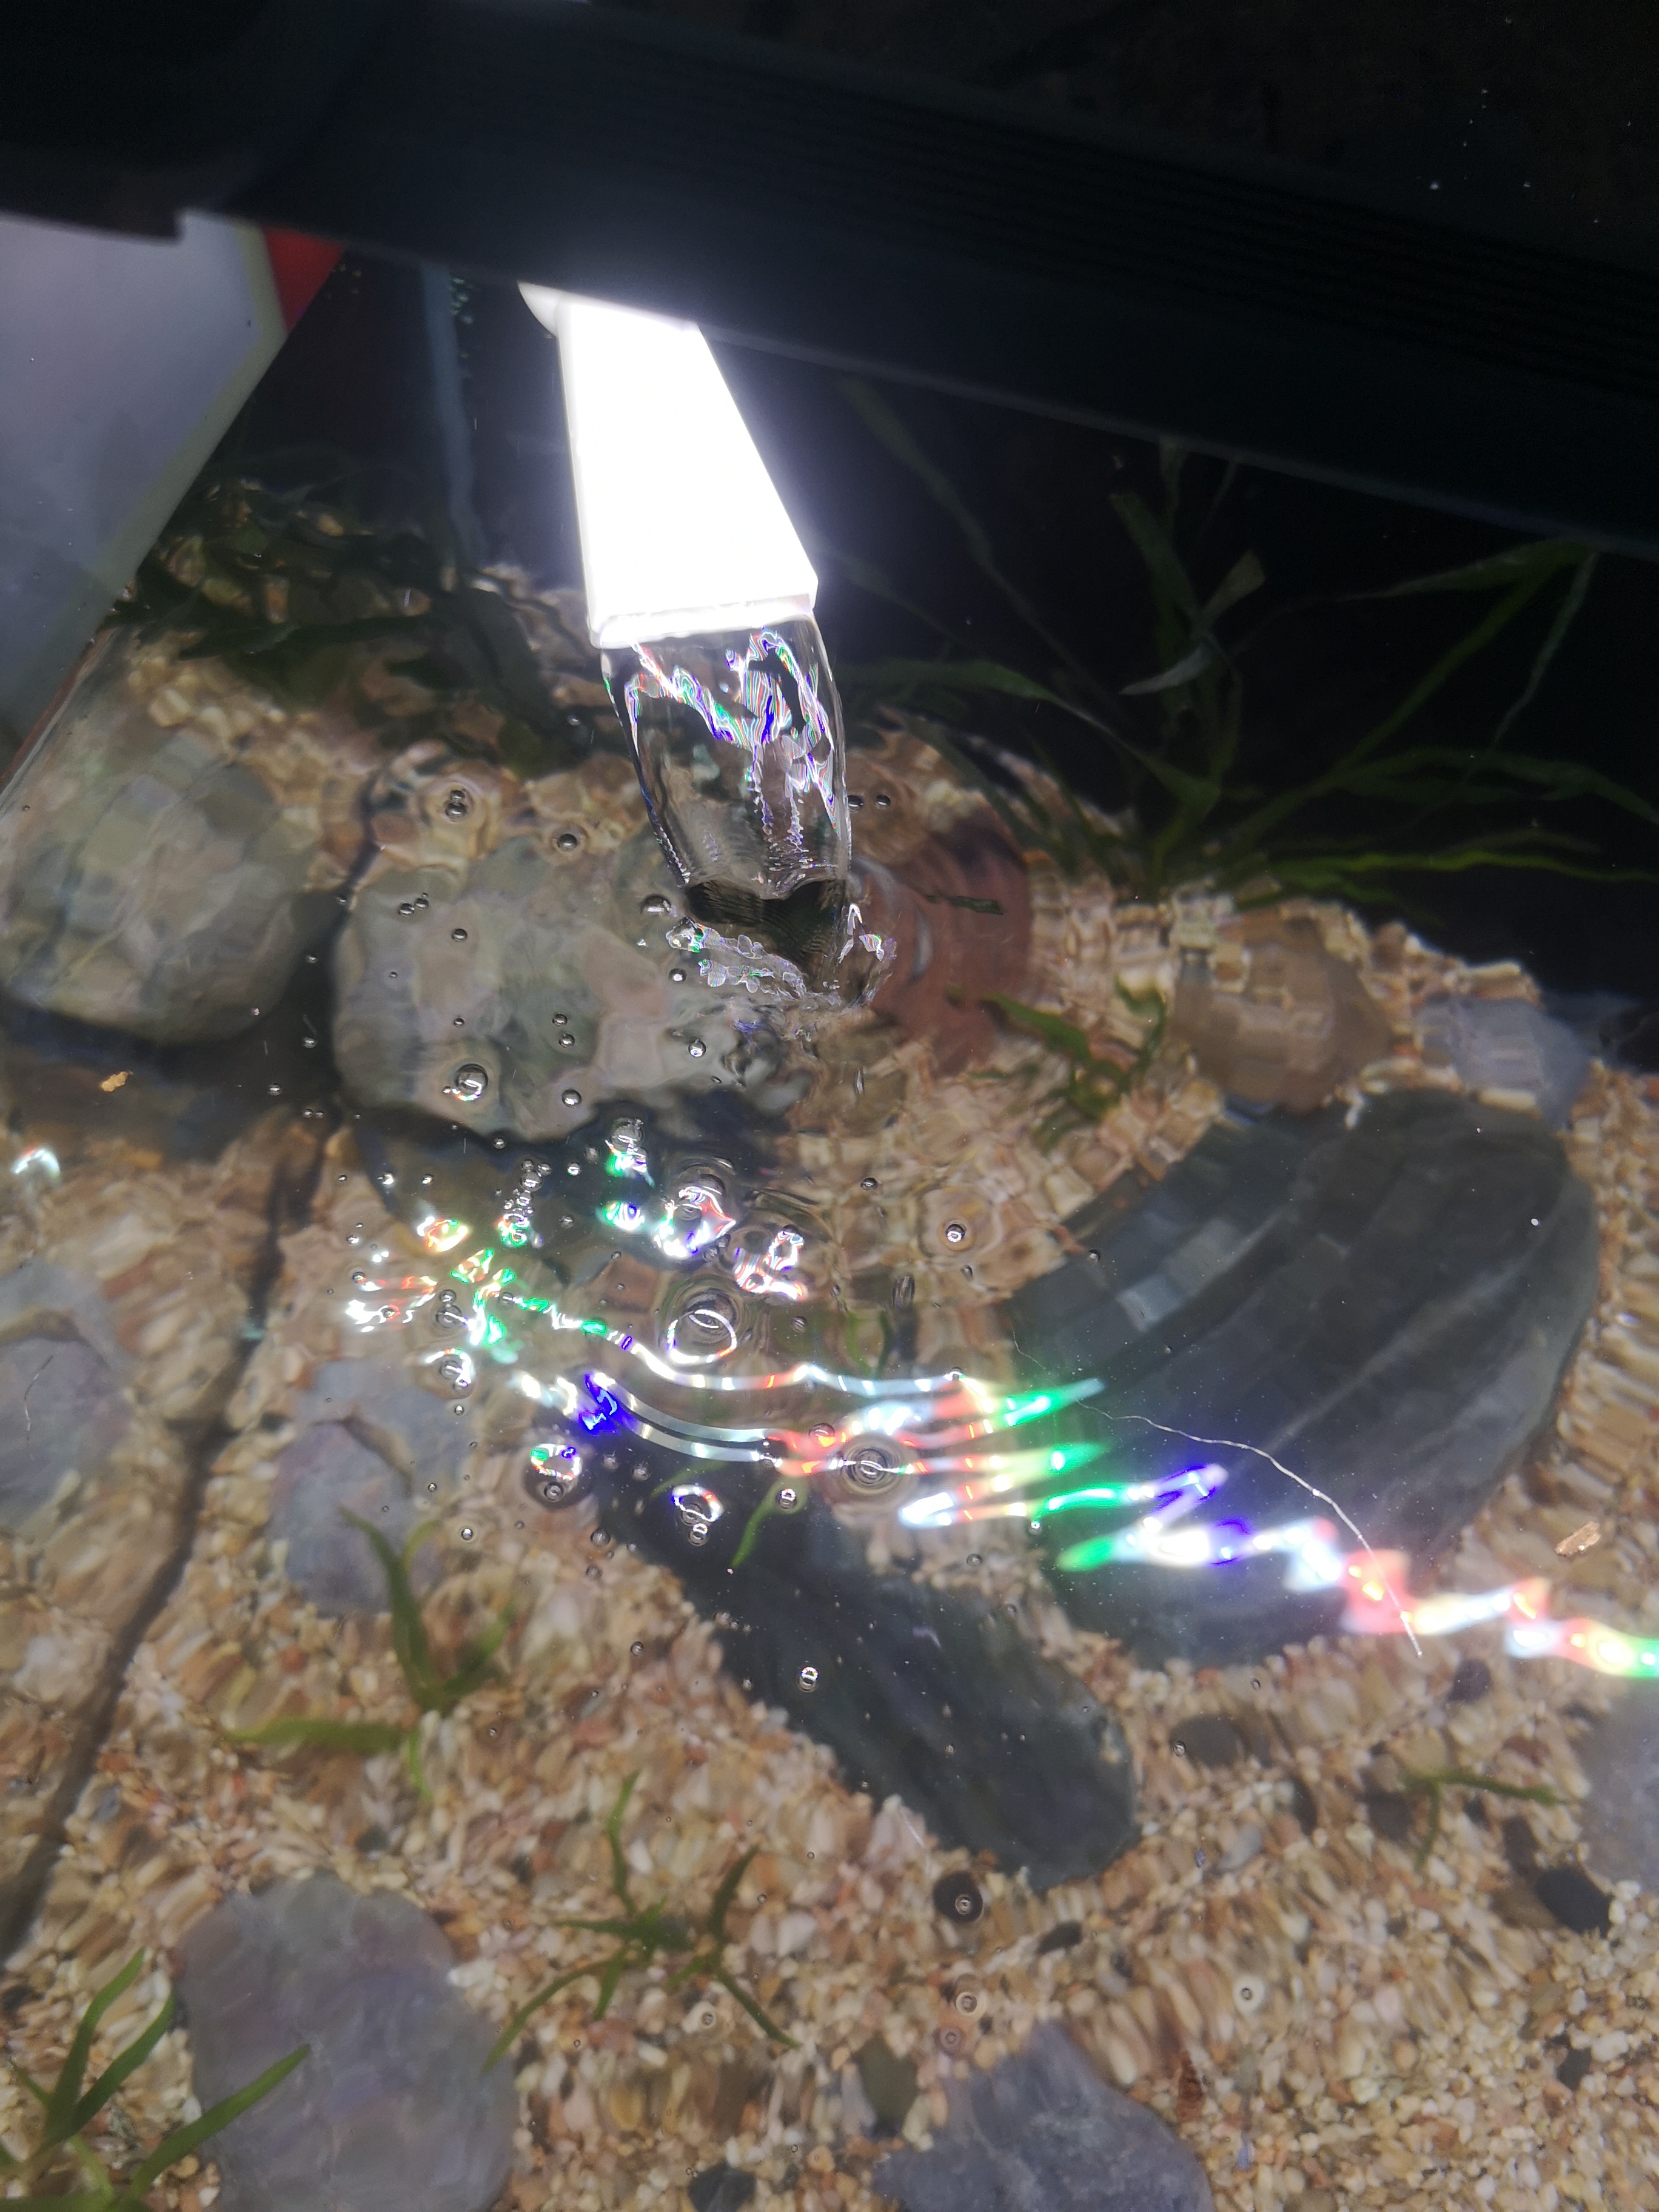
Testing System
This is a simple but necessary step. Plug in all your devices and open all switches. Find out if there are something not working or making abnormal noises, which indicates a potential failure point. Besides, make sure the water current is strong enough, or there might be some blockages or bubbles in your pipes.
Establishing Nitrification System
This is another story, including some problems and surprise, and I will write another blog for it.
Equipment Used
Mi Shanhai 10W water pump, 800L/H
then replaced by Atman AT-304s 8W 800L/H pump due to noise
Sensen HW-604B external filtration
Cherlam CCY-001S 3W 300L/H oil film remover
JIYIN 10.6W native lighting